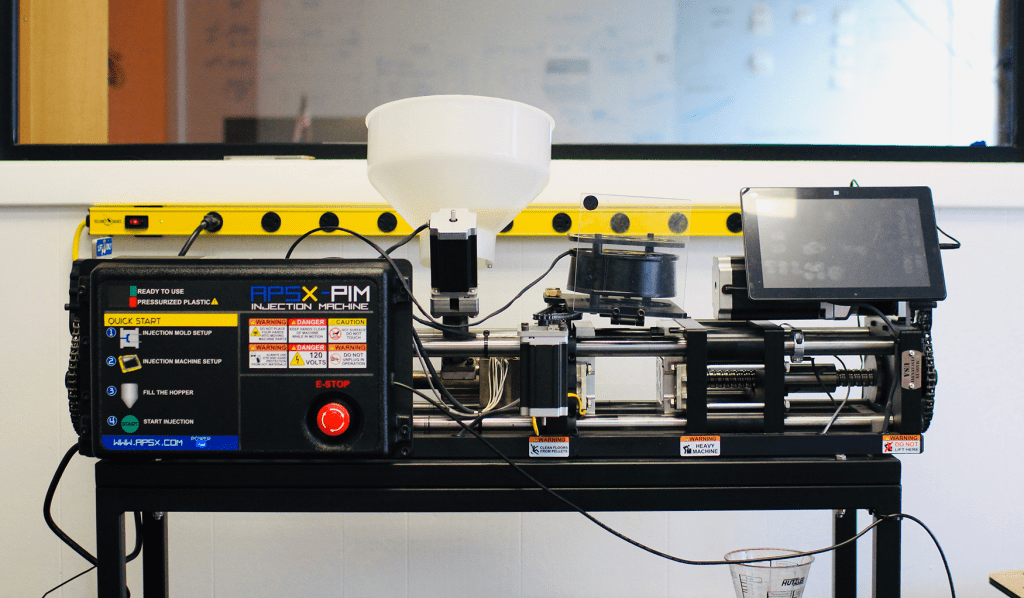
Sometimes a 3d printer just doesn’t cut it when certain parts require specific materials and durability, or require a higher level of surface finish. That’s where our APSX Machine fits into our workflow. We can simply design a part, CAD up a quick aluminum cavity and then send that off to be cut. Once we receive the temporary tool, we can do a small injection run and dial in all sorts of parameters that meet a projects specifications.

After using the machine for quite some time, we quickly became aware of some user experience improvements that we shared with the APSX team. They were thrilled to hear our feedback which lead to a couple rounds of design concepts where we illustrated solutions for enclosing the machine and suggested a more studio-appropriate look.

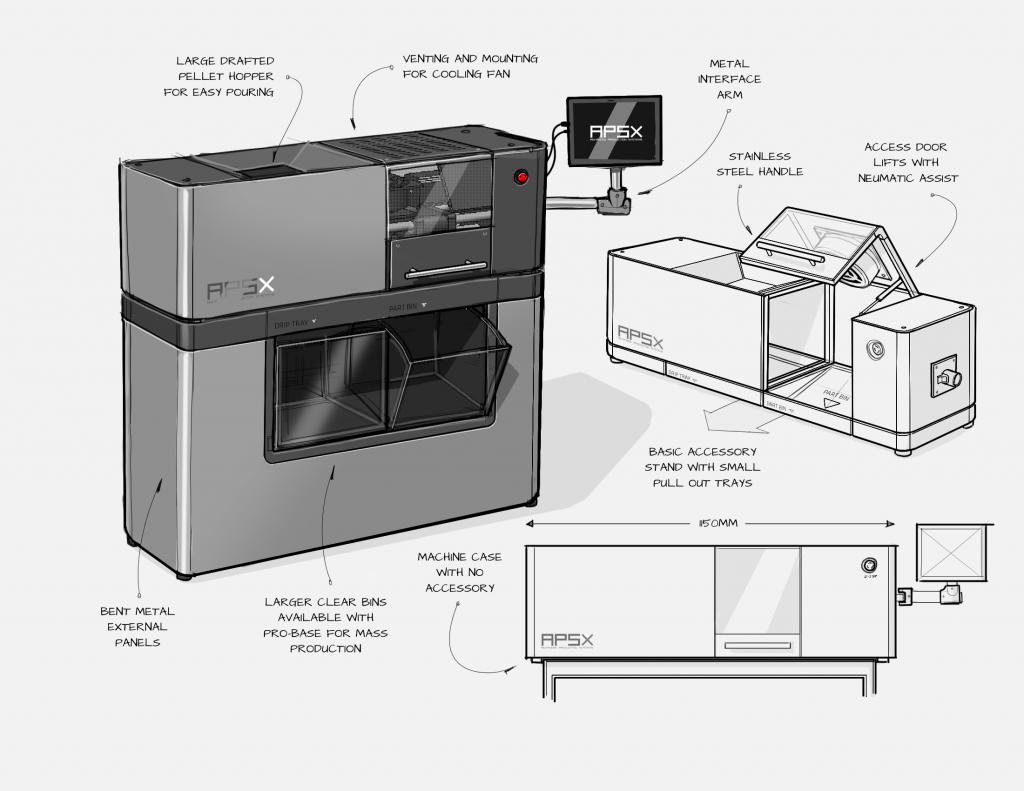
We considered more ergonomic screen angles, lower profile hopper geometry, drip trays and part bins, and provided some solutions for accessing the machines components between runs. In the concept page above, we wrapped the internal components with a brushed metal exterior and provided a case that could be sold with a “pro” stand, a simple organization tray system, or without either. Giving APSX the flexibility to sell just the machine or with its various accessories.

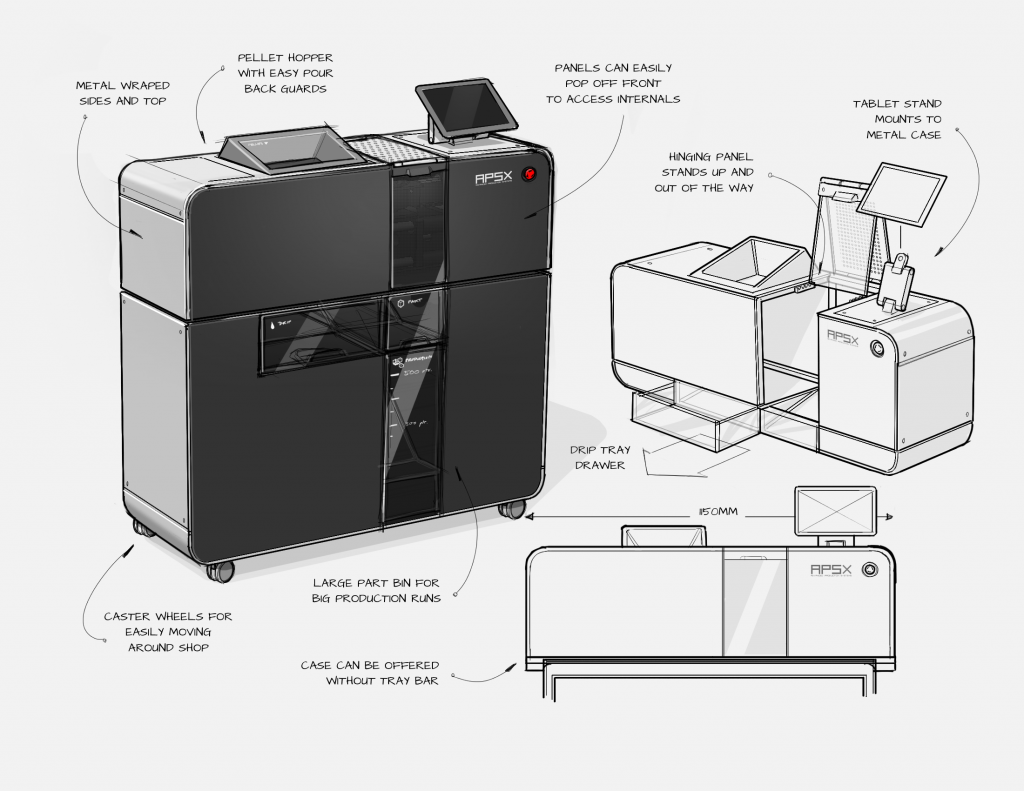
With any of our client work, we seek to diversify our concept set in the first round. We aim to address each user need or client expectation but bring something unique and unexpected to the designs. Above, we suggest adding caster wheels to make moving the machine about the studio or shop much easier.

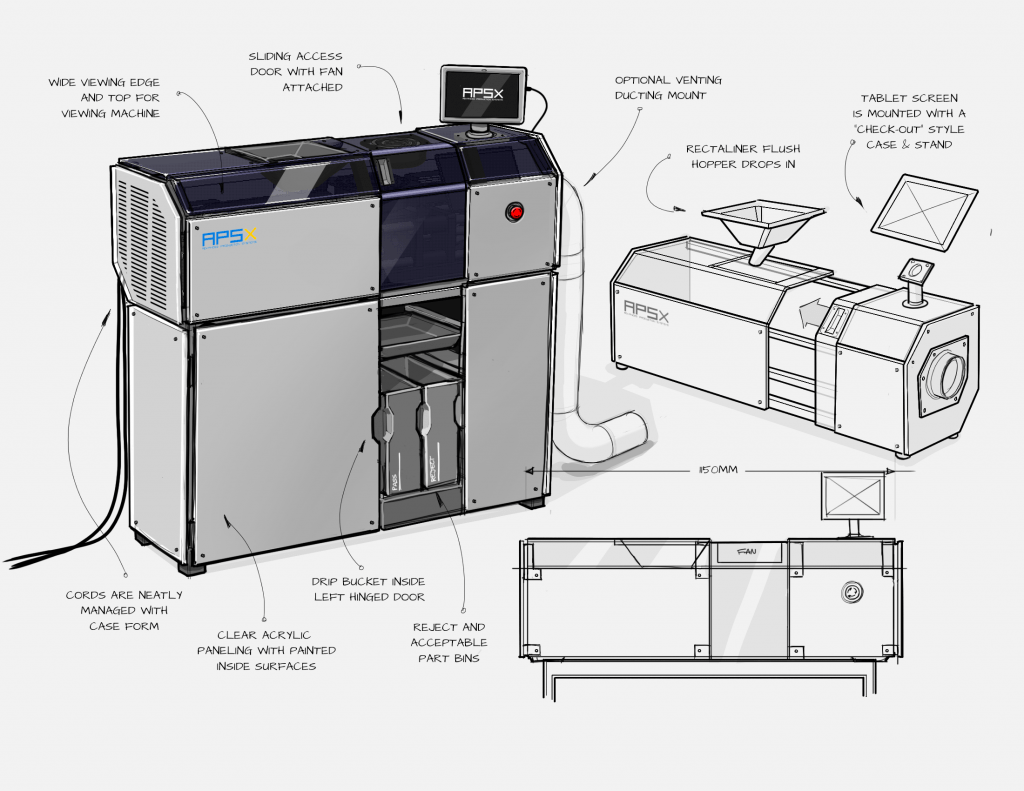
We find the that one of the best strategies when down-selecting and channeling our ideas into a concept offering is to take a mild to wild approach. In this case, the concept shown above being a “mild” example, demonstrates an easy entry point design due to its economic material choices, ease of fabrication and assembly.
Stay tuned for more updates as this project develops! Hope you enjoyed some insight into our concept generation process.
Cheers!